How To Make A DIY Chunky Knit Blanket


Ohhh my goodness you guys, this post has been a long time coming. Not only has this project been sitting in a box in my living room for months -- but it is also my first ever knitting project! And I promise I'm not exaggerating -- I had never knitted (in my life) prior to this blanket. I can't even piece together a French braid -- so yah I think it's safe to say I came to this project as an absolute beginner.
I'm sure you have seen a giant chunky knit blanket somewhere in recent years, most likely on Instagram or Pinterest. I myself saw one for the first time at a friend's house a while back, in the before times -- I was dropping her pup off (hi Kelly!) and saw two ginormous balls of yarn, which immediately peaked my interest.

When we decided to update our home space last year, I knew instantly that I wanted to include a handmade knit blanket in the design layout and DIY projects. I knew pretty much next to nothing about making the project, just that I wanted to make it. And I figured -- I can sew, so I can knit.. right? I'm sure you can guess how that went.
So -- this week's DIY home post is going to be all about the gorgeous chunky knit blanket: What goes into it, where I bought my yarn, and how to knit it together. Because I myself absolutely had to look up the knitting process, and it turns out there aren't all that many great tutorials out there on how to do the actual knitting. Let's get started!
(This post on how to make a chunky knit blanket is part of our DIY home project series -- a full guide with all of the tutorials is coming soon! Get on the list now and be the first to receive the guide straight to your inbox.)

What you need to make a DIY chunky knit blanket


During my research on this project, I found that there are two types of yarn that you can get for a chunky knit blanket:
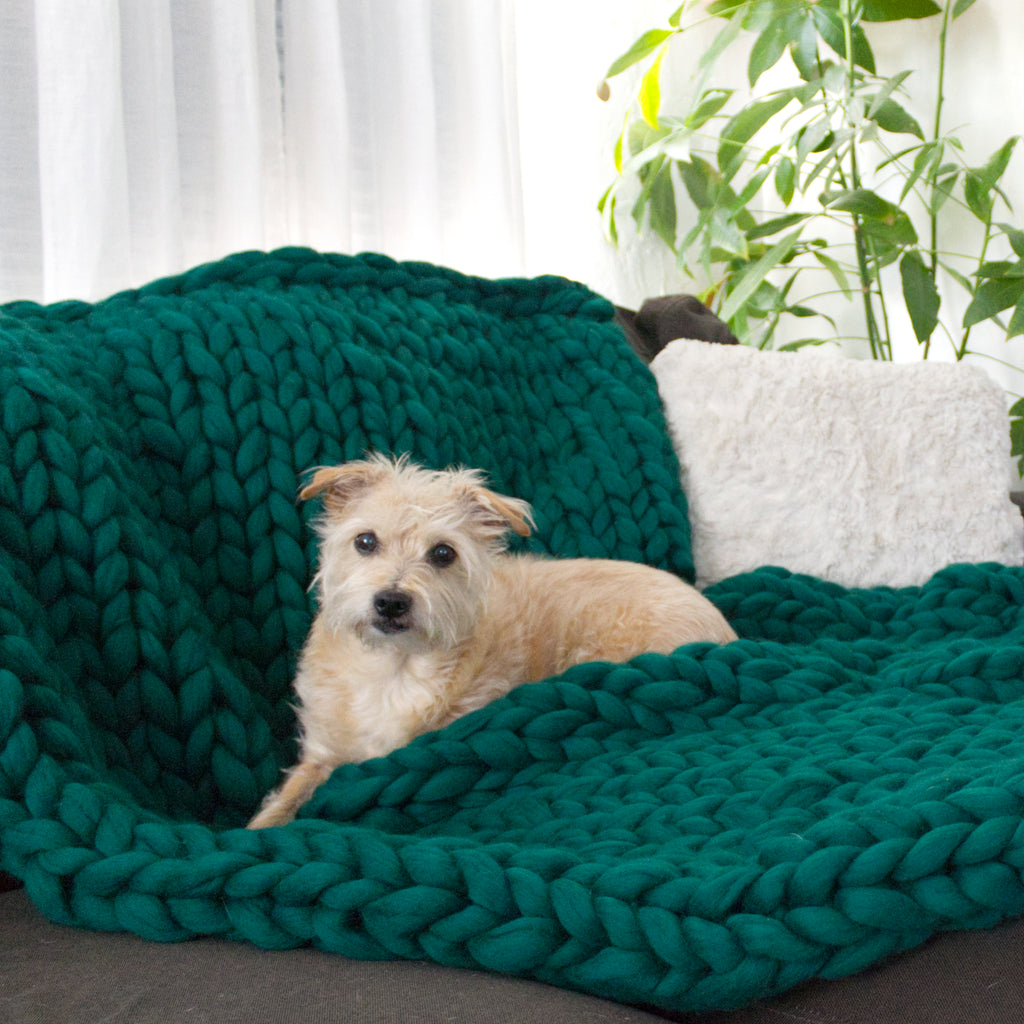
- Wool: This is the route I ended up going for the project -- the wool is felted together in thick strands, and is so pillowy soft it is absolutely gorgeous. (And also incredibly warm! My dog is obsessed.) But keep in mind -- wool is not cheap, and this project wasn't either. (This is the Etsy shop I bought my DIY kit from.)
- Chenille: This yarn has a more fuzzy, textured look to it rather than the soft luster of wool -- but is ideal for those that would rather use a vegan yarn! It's also on the more affordable side for a project of this scale.
So, which yarn to choose? I have never worked with the chenille type of yarn before, but I can tell you I did enjoy working with the wool. Once I got the hang of it, the yarn was easy to work with and it just looks gorgeous. I will include a few tips and lessons learned at the end of the post -- check that out if you want to learn more about working with wool yarn.
The only other tool that I needed for this project? Wooden circular needles. My needles are thick wooden blocks with a plastic tube connecting them. They pretty much baffled me at first, but once I got into the groove of knitting, I actually really ended up liking them. I do know some people that have done this project just knitting with their hands -- but I am nowhere near that point of skill level, so I am sticking with my circular needles. And that's how we will be moving forward!
(This post on how to make a chunky knit blanket is part of our DIY home project series -- a full guide with all of the tutorials is coming soon! Get on the list now and be the first to receive the guide straight to your inbox.)
How to make a DIY chunky knit blanket: Step 1


To start, unravel the entire ball of yarn. I wasn't quite able to do this since I was working in a pretty small space -- but at the very least unravel the majority of the yarn so that you have decent amount of length to work with.
With the yarn unraveled, you want to set aside a length of yarn that will ultimately finish off the blanket. Prior to stitching, you should know how wide your blanket is going to be -- the shop you buy your yarn from should be able to give you a general guideline of how wide and long the finished blanket will be, depending on how much yarn you buy.
For example: My finished blanket measures 40" x 60". To determine how many loops make up the width of the blanket, I would recommend dividing the width (roughly) by 2. Which, for our purposes, means that our blanket will be 20 loops wide, and that we need to measure and set aside 20 loops worth of yarn.
To do this, grab the yarn in your hand and pull it down (roughly) to your elbow. That's one loop worth of fabric. Repeat the process until you have 20 loops worth of yarn. (Or however many loops make up the width of your blanket.) This smaller pile of yarn is our reserve yarn and the bigger pile is the working yarn.
How to make a DIY chunky knit blanket: Step 2


Grab the point of the yarn where the reserve yarn ends and the working yarn begins, keeping the two piles separate. Place that point in between your index and middle finger, on your left hand. Loop the yarn around the inside of your thumb, around the outside of the thumb, and pull across the palm of your left hand.
Grab a needle and insert into the loop around your thumb. Next, using the tip of the needle, grab the thread that is hugging your index finger. Use your thumb to pull the yarn over the tip of the needle, and pull the needle through to create the first stitch.
(This post on how to make a chunky knit blanket is part of our DIY home project series -- a full guide with all of the tutorials is coming soon! Get on the list now and be the first to receive the guide straight to your inbox.)
How to make a DIY chunky knit blanket: Step 3


With the loop on the needle, hold the needle in your right hand. Grab the left tail of yarn, and place in between your middle and index finger. Loop the other tail of yarn around the outside of your left thumb.
Twist your left hand so that your palm is facing you and point the needle in your right hand towards the left. Move the right hand needle up into the loop around the left thumb. Continue upwards with the needle, keeping the thread that is in between the middle and index finger in front of the needle. Pull the loop around the thumb up and over the tip of the needle, pulling it through.
Repeat the process until you have the length of loops that is the width of the finished blanket. (i.e. 20 loops in our case.)
How to make a DIY chunky knit blanket: Step 4 (Purl stitch)


Turn the needle and loops so that the tip of the needle is pointed to the right. Place the working yarn so that it is on top of the left needle. With the bare needle in your right hand, push the needle into the first stitch, in between the yarn and needle.
With the tip of the right needle, grab the working yarn and pull it onto the right hand needle. As you pull the working yarn loop onto the right hand needle, pull the loop that is on the left hand needle clear off of the needle. This will result in a loop on the right hand needle and a new purl stitch below the right hand needle.
Repeat the process until you reach the end of the row of loops. (i.e. This is our 20 loops.)
(This post on how to make a chunky knit blanket is part of our DIY home project series -- a full guide with all of the tutorials is coming soon! Get on the list now and be the first to receive the guide straight to your inbox.)
How to make a DIY chunky knit blanket: Step 5 (Knit stitch)


With the row of purl stitches complete, flip the needle so that the tip with the loops is facing right. Grab the bare needle in your right hand and insert into the first loop, simply just pulling it off the left hand needle and on to the right hand needle.
For this next row of knit stitches, keep the working yarn behind the needles. Insert the right hand needle inside next stitch on the left hand needle -- this is behind the needle, but in front of the yarn. With the right hand needle inserted, using the tip of the needle, grab the working yarn and pull it through the loop of the left hand needle. To complete the knit stitch, pull the loop off of the left hand needle.
Repeat the process until you reach the end of the row of loops. (i.e. This is our 20 loops.)
Repeat the process of step 4 (a purl stitch) then step 5 (a knit stitch) until you reach the end of the blanket.
This is the most time consuming (but also most therapeutic?) part of the process. While I did get in a groove eventually -- I had to make sure I checked my instructions every single time I started a new row. Otherwise I would get incredibly confused: Which row did I just stitch? Oh god, was it a knit? Or a purl? If you are at all a knitting novice like me -- keep your instructions close and do not let them leave your side, even for a single row.
If you are making a large blanket (as I did) you may have multiple balls of yarn (as I did). I have no idea if this is right -- but when I ran out of one ball of yarn I simply tied the ends of the two together. I tried to make it tight without being too tight, so that it would remain roughly the size of a regular strand and I could hide it in my stitching. It's not perfect, but it works, and I honestly have no other idea on how I could have connected the two balls of yarn.
And finally, I would recommend trying to end on a purl stitch -- that seemed to work the best for me!
(This post on how to make a chunky knit blanket is part of our DIY home project series -- a full guide with all of the tutorials is coming soon! Get on the list now and be the first to receive the guide straight to your inbox.)
How to make a DIY chunky knit blanket: Step 6


Now it's time to close up the last stitch on the blanket. To start, cut off the original tail of reserve yarn that you set aside in the beginning. I would recommend leaving a few inches of the yarn so that you can wrap it up inside of the blanket stitches to hide it. And that closes up one end!
For the other end, tie the reserve yarn to the end of your working yarn tail. Set up your blanket so that your working needle is pointed to the right. Insert the bare right hand needle into the first two stitches on the left hand needle.
Next, wrap the tail of yarn around the tip of the right hand needle. Pull it through the two loops on to the right hand needle. Push the two loops on the left hand side off of the needle. Grab the loop on the right hand needle and slide it back on to the left hand needle. Repeat the process until you reach the last two loops on the left hand needle.
How to make a DIY chunky knit blanket: Step 7


Switch out the needle so that the right hand needle is inside the remaining two loops. Wrap the remaining tail of yarn around the tip of the needle and pull through the last two loops.
Leaving the loose loop open, pull the right hand needle out. At this point you should have that last open loop and the little remaining tail of thread ready to tie off. Insert the tail of thread into that last loop and pull tight to secure. Then simply wrap the remaining tail within the stitches, hiding it as well as you can. And that's it!
(This post on how to make a chunky knit blanket is part of our DIY home project series -- a full guide with all of the tutorials is coming soon! Get on the list now and be the first to receive the guide straight to your inbox.)
A few final tips & lessons for this project


So as it turns out, knitting is hard.
It took me about 4 tries to get this blanket right -- the first time I tried to follow the original instructions that came with the blanket, which was a mistake. They were in broken Ukranian English (the term "soup spoon" was used in relation to the knitting process and I still have no idea wtf that means) and were just so confusing I became pretty irate from the start.
The second time I knit too tightly -- which resulted in me pulling the wool a little too aggressively and I broke the yarn, which unraveled my progress and I had no idea how to pick it back up again. The third time I knit too loosely -- the stitches were inconsistent and just did not look good. Which resulted in the fourth iteration of my chunky knit blanket: A gorgeous, beautiful, handmade blanket that my dog refuses to get off of.
I was pretty frustrated with this project when I first started it -- but I actually really ended up loving it once I got the hang of it.
(This post on how to make a chunky knit blanket is part of our DIY home project series -- a full guide with all of the tutorials is coming soon! Get on the list now and be the first to receive the guide straight to your inbox.)

So, a few lessons I really wish I had known when starting this project the first time:
- Make sure you follow detailed instructions from the start -- don't even bother with anything that doesn't click in your brain. (Videos help!) I based this tutorial (and my entire blanket) off of a video I used throughout the entire process. Maybe you will find it useful too!
- Do not knit too tightly -- if using Merino wool, as I did, then it WILL result in the wool pulling apart and splitting. While I do have a few tie offs in this project, it's ideal to have fewer of them rather than more.
- Do not knit too loosely -- in the video I watched, the lady consistently says to knit "as loose as possible". Which I did, and it turned out terrible. I think a better mantra to go by when knitting this project is to knit consistently. If you knit slightly tighter, knit that consistency the entire length of the blanket. Or vice versa.
- While wool is beautiful, it's not perfect like in all the Instagram photos. It pills insanely easily and fluff is constantly shedding. And as I mentioned above, my yarn also split a few times -- it's not all that strong of a fiber. So keep this in mind -- it might be a reason to go with the chenille yarn instead.
- If you don't want to have a knot at the end of your blanket (as in the final step) you absolutely can work around that step. I simply did it that way because that's how it was done in my video -- and I have no idea why she included such a long tail for her blanket.. I never saw her do anything with it. To avoid the extra knot, simply leave less of a tail at the beginning of the project, and make sure to stop a yard or two from the end of your last ball of yarn to ensure you have enough to finish up. The nice thing about my method is that you KNOW you will have enough to finish up -- you just have to deal with one extra knot, which can be pretty easily hidden. It's a worthy trade-off IMHO.
Would you guys be interested in an actual video of the process? I didn't make one this time because it was my first go round and I honestly had no idea what I was doing.. But I think if I did a second one I could knock a video out pretty easily. I would have been absolutely lost without following the video I found throughout the process and would love to make one if you guys are interested. And hey -- that gives me an excuse to buy materials for another blanket!
(This post on how to make a chunky knit blanket is part of our DIY home project series -- a full guide with all of the tutorials is coming soon! Get on the list now and be the first to receive the guide straight to your inbox.)


![]()
![]()
![]()