How To Sew A French Seam: The Violet Midi Sewing Tutorial


Are you one of those gals that loves to sew with sheer, lightweight fabrics? Or maybe you just really like having a clean finish to your raw edges? Or maybe you just REALLY like the Violet Midi? Well either way.. Our newest sewing tutorial on how to sew a French seam is going to be your BFFL. I promise!
But first.. You may be asking. What in the world is a French seam? A French seam is essentially a raw seam that is encased within itself.
And now you may be asking.. WTF does that even mean?
Most of the time, after a seam is sewn together, the edges of the seams are still raw and unfinished. There are 2 pretty popular, tried & true ways in which to finish said raw edges:
- By finishing them off with a serger sewing machine.
- And by closing off the raw edges using a seam binding. (BTW we have a sewing tutorial on how to sew a knit seam binding, in case you need it!)
And of course, there are other ways in which to finish off a raw edge.. But the methods above are the ways in which I prefer to finish them off. And add to that list now:

While a serger stitch and a seam binding are methods applied to a seam AFTER it has been sewn together, a French seam involves the actual sewing process in which a seam line is put together. No additional work is needed once the seam is sewn up.
(Ready to learn how to sew properly with sheer and lightweight fabrics? Print out our easiest sewing tutorial yet, and you'll be sewing French seams in no time!) 


Ok cool. So why & when would I use a French seam? Excellent question my friend. French seams are ideal to use when:
- Sewing with sheer fabrics. With sheer fabrics, all of the inside sewing can be seen from the outside. Which means that you want to make said sewing pretty and clean.
- Sewing with lightweight fabrics. When sewing with lightweight fabrics, you really want to minimize how much weight is added to them. (For example: A seam binding could potentially weigh a lightweight fabric down, resulting in the fabric pulling from the inside. And we don't want that. Because it would not look good.)
- You want a clean finish. While French seams are a bit more work than just sewing up the raw edge using a serger, they look 100% cleaner and more professional. If you want that polished, sophisticated look, then French seams should be your go to seam finish.
Ok cool. So you definitely want to learn how to sew a French seam now, right? Keep on reading, my little dove! Because this is our easiest, quickest sewing tutorial yet.
(Ready to learn how to sew properly with sheer and lightweight fabrics? Print out our easiest sewing tutorial yet, and you'll be sewing French seams in no time!) 
How to sew a French seam sewing tutorial: Step 1
SO. To start, pin the raw edges of the seam line together, wrong side to wrong side. Yes, you read that right. Wrong side to wrong side.
REMEMBER: The wrong side of the fabric is the side that is not seen when the garment is being worn.

Pinning the fabric wrong side to wrong side will feel completely weird, because with every other seam finish the garment is sewn together right side to right side. But I promise you, it's right.
NOTE: And if you are working with a lightweight, sheer fabric, make sure to pin your pins very closely together. This will help keep the fabric from slipping during the sewing process.
How to sew a French seam sewing tutorial: Step 2
Next, machine stitch the seam line together at HALF of the marked seam allowance.
FOR EXAMPLE: The seam allowance for the Violet Midi was 1/2", so I sewed this step at 1/4".

Again, this will feel completely weird and wrong, but I promise it's right.
And if working with a sheer, lightweight fabric, make sure to sew very slowly to ensure that the fabric doesn't slip and move around.
(Ready to learn how to sew properly with sheer and lightweight fabrics? Print out our easiest sewing tutorial yet, and you'll be sewing French seams in no time!)
How to sew a French seam sewing tutorial: Step 3
With the seam stitched together, it's time to press it open.
While I prefer to press the seam open from the inside, it could also be pressed open from the outside of the garment. But the choice is yours, you do you.

NOTE: Steps 3 &4 are pretty much interchangeable, and can be switched up if you prefer. The end result is the same, so it's up to you!
How to sew a French seam sewing tutorial: Step 4
And with the seam allowance pressed, it's time to trim it in half.
FOR EXAMPLE: I sewed the seam allowance for the Violet Midi at 1/4", so I trimmed the allowance down to 1/8".

If the seam allowance is not trimmed in half, then loose threads could potentially peek through the finished seam. Which we definitely don't want, because it does NOT look good.
And if you do need to trim more than half, then go right ahead. But I do think that trimming the allowance by half is a pretty safe bet.
(Ready to learn how to sew properly with sheer and lightweight fabrics? Print out our easiest sewing tutorial yet, and you'll be sewing French seams in no time!)
How to sew a French seam sewing tutorial: Step 5
With the seam allowance trimmed, fold the garment in half, right side to right side. Again, this will feel completely wrong, but I promise it's right.
Pin the garment back together along the intended seam line.

NOTE: As with step 1, pin the pins very close together, to avoid having the fabric slipping around when sewing in the next step.
How to sew a French seam sewing tutorial: Step 6
With the seam line pinned again, it's time to stitch it closed.
Simply stitch the seam line together, using the same seam allowance measurement from step 2.

FOR EXAMPLE: My original seam allowance for the Violet Midi was 1/2". I sewed step 2 at 1/4" seam allowance, & I also sewed this step together at 1/4". Make sure to keep track, and keep the measurements even.
(Ready to learn how to sew properly with sheer and lightweight fabrics? Print out our easiest sewing tutorial yet, and you'll be sewing French seams in no time!)
How to sew a French seam sewing tutorial: Step 7
And finally, the last step! With the seam fully stitched together, press the finished French seam to one side.
And while I prefer to press my French seams towards the BACK of the garment.. The choice is yours. You do you.

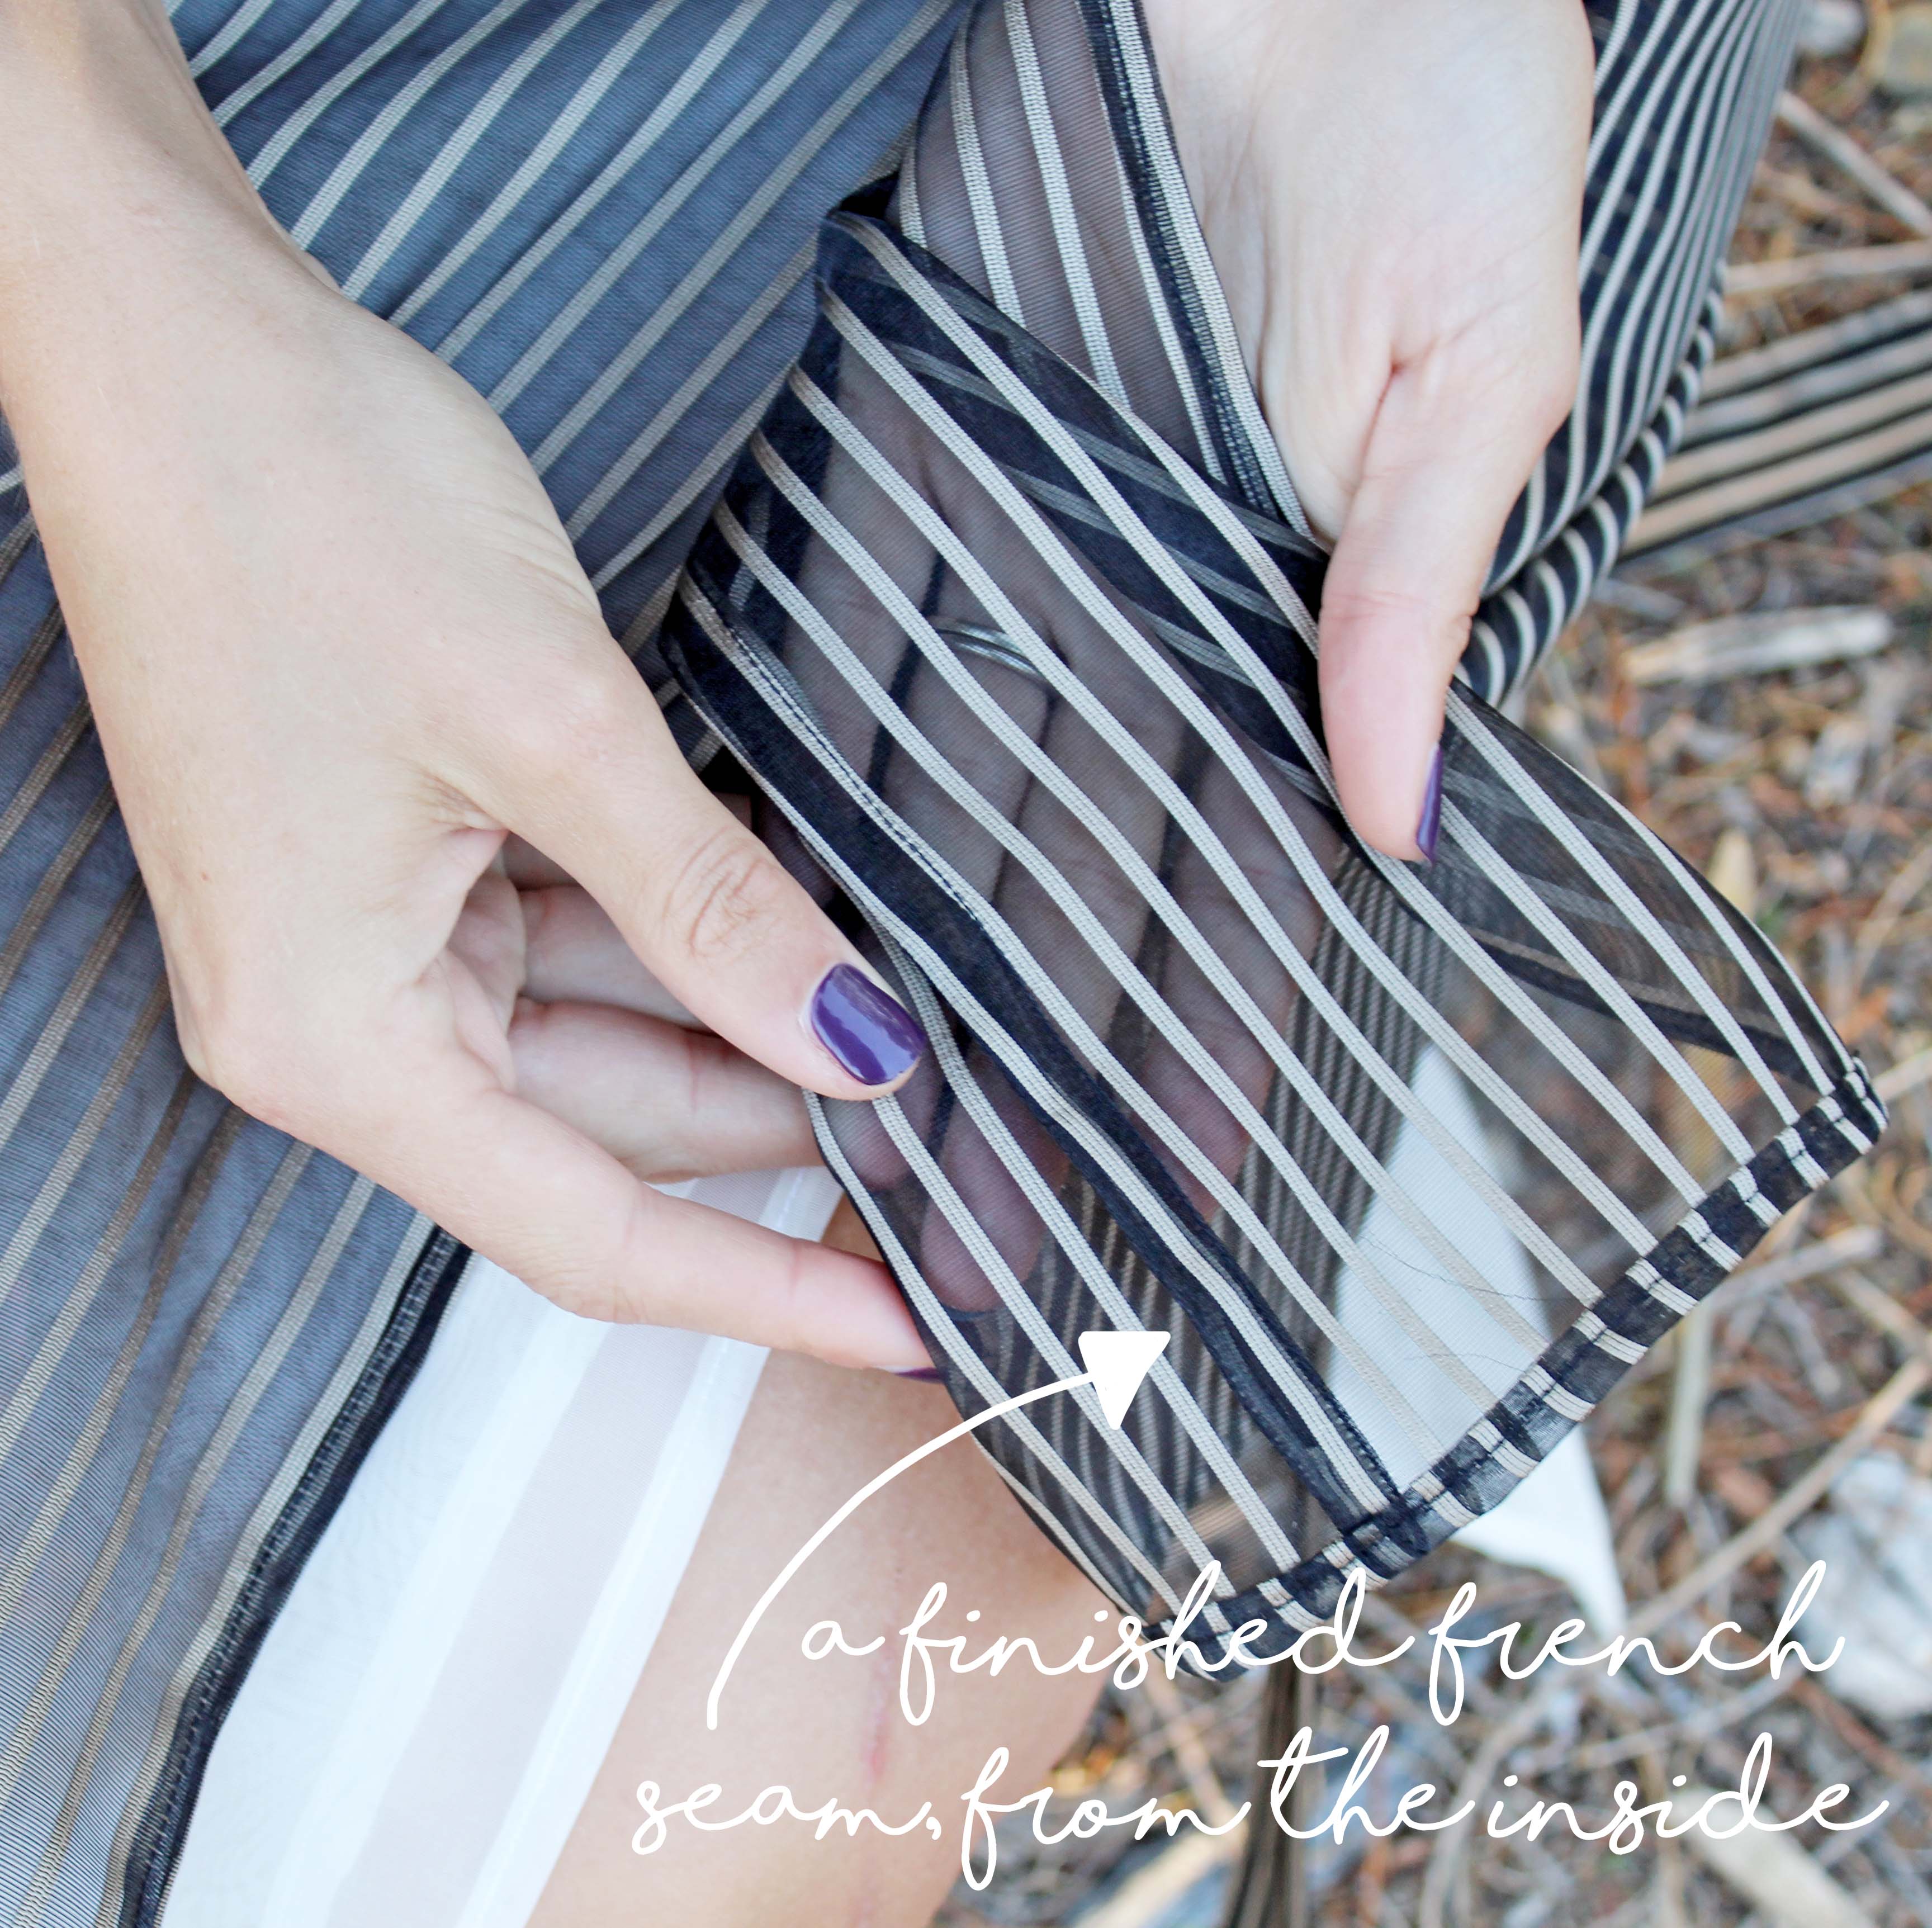
How to sew a French seam: Are you ready?
And that's it! Not too bad, right?
Sewing up a French seam does take a bit more work than just serging up a raw edge, but it looks SO. MUCH. BETTER.
Edges are cleaner, and there's no chance of said edges unraveling. And when working with sheer fabrics, it's definitely better for a clean, finished edge to show through rather than a raw or serged edge showing through.

And as I mentioned above, the best times to use a French seam are when:
- Sewing with sheer fabrics.
- Sewing with lightweight fabrics.
- You want a clean, polished finish for a seam line.
So. Ready to mix it up and start sewing with French seams?
Once you get the hang of sewing with them, they really are so incredibly easy to work with. You kind of just have to wrap your mind around sewing a little bit backwards at first.. But then you've got it down for life.
Are there any other seam finishes that you guys have been wanting to learn how to sew? Because I'm always looking for ways to mix things up!
(Ready to learn how to sew properly with sheer and lightweight fabrics? Print out our easiest sewing tutorial yet, and you'll be sewing French seams in no time!)


![]()
![]()
![]()


