How To Organize My Sewing Space: DIY Sewing Table

When I originally published this post (over two years ago now!) it was the first in our series on how to organize my sewing space. Why? Because I use my DIY sewing table every. single. day. Even when I'm not sewing or working on a project, I'm using it.
It is, without question, my most important sewing tool. (If you can call it a tool--It's fairly large.)
But really. My DIY sewing table not only gives me a space in which to cut fabric for project (I am saving my back by not cutting on the floor--and you shouldn't be either) but it also provides ALL of the storage I need for my sewing tools and machines. (Because yes, my sewing machine count is up to 6 now.)
I also use my DIY sewing table when drafting sewing patterns. When sewing. To take photos for the site. As just a general end table when I'm not "using" it. It is quite literally the most effective way in which I organize my sewing space.

I feel like there is this misconception that you have to have a special room and tons of space for sewing. (Which is yet another excuse I hear for not learning how to sew: "I just don't have the space...") I hate to break it to you.. But that's just plain false.
I don't know how much space you have in your home, but I don't have a lot. I'm talking 400 square feet--That's how big our home here in San Diego is. And 400 square feet is NOT big. At all. I know people whose bedrooms (whose SPARE bedrooms) are bigger than our entire home.
As of right now, I'm not at the point in my business where I can afford to rent out a sewing studio. So my husband and I had to get creative with how to organize my sewing space when I decided to pursue this blog and my business full time.
And get creative we did!
(Not sure where to start when it comes to sewing? Building your own sewing kit is an excellent first step! Grab your free, printable worksheet below and start learning how to sew your own clothes today.)
Why we made this sewing table

Prior to making my sewing table, we actually did the research and tried to find a ready-made one that we could just purchase. I mean, they have to exist, right? Wrong, so wrong.
Not only did I need a table that I could fold up to work on and then down again to store in our small space, I also needed a sewing table that would double as storage. Because, as anyone that has ever lived in a small space knows--Storage is EVERYTHING.
Living in a small space means that you have to get creative with where you can find space to store things. Half of our sofa is storage, underneath the cushions. The entertainment set up for our TV doubles as shelf space for books.
Our benches out on the back patio double as storage for the things we don't need every day in the house, but don't want to get rid of.

And came up completely empty. At one point, we did find a super fancy sewing table that would fold up and down (but no storage) for like $500--Hard pass. So, after all this research, Paul (my brilliant, craftsman of a husband) drew out an idea of what I wanted and needed.
On my list of needs to functionally organize my sewing space were the following:
- A very wide table, wide enough that I could fit a roll of fabric on it.
- A very long table, long enough that I could cut an entire marker on it. (Or at least most of a marker.)
- Storage for all of my sewing machines and supplies.
- Tall enough where I wouldn't be hunching over as I'm cutting and sewing.
- Slim enough that we could store it somewhere in our tiny house, and not have it be an eyesore.
A tall order, I know. But. BUT. He did it.
(Not sure where to start when it comes to sewing? Building your own sewing kit is an excellent first step! Grab your free, printable worksheet below and start learning how to sew your own clothes today.)
What makes up my sewing table


Why do I love my DIY sewing table so much? Oh, let me count the ways. It's tall enough to where I'm not bending over when Im working on patterns or sewing. (Whether I'm sitting on a stool or standing.) There are three shelves of space, where I can store everything I need.
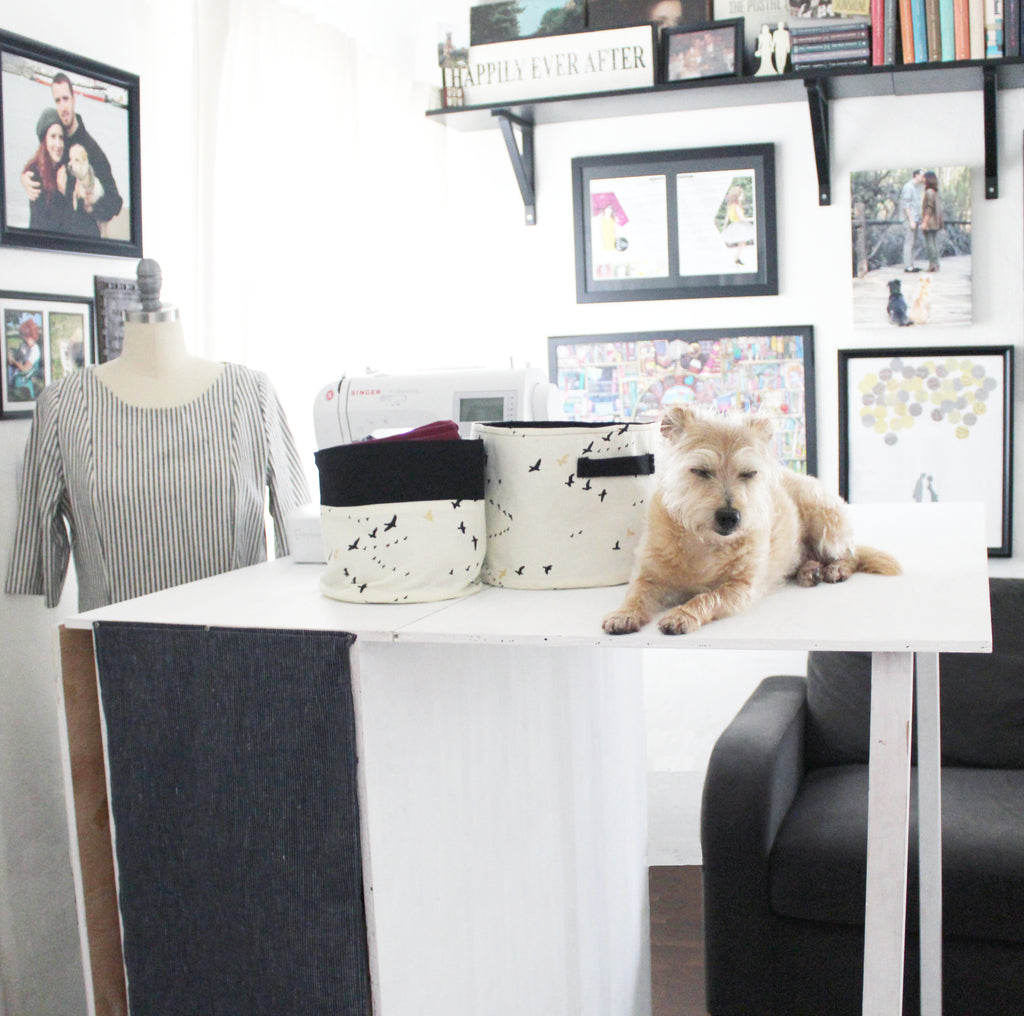
And what makes the table: There are two large pieces of wood attached to the storage (i.e. the center) of the table. They are pretty much the wings of the table--Attached by hinges, they fold up when I need a really big table and down when I need to store the table in a small space.
The wings themselves have two thin legs on each outer corner, also attached with hinges. They fold down and stand as legs when I need to use the table, and fold up (held in place by nail pegs) when I need to store the table.

The wheels are fully functional, and can roll in any direction. This makes it easy to store the table in the corner where it spends most of the time, out of the way. When I need the table, I roll it out of its corner, pull out a wing (or two) and get to work.
There is also a handle attached to one of the shelves, to help pull the table in and out of its storage space. The sewing table is pretty much the definition of fully functional: It does everything that I need it to for sewing and pattern drafting, but it also provides tons of storage and doesn't take up a lot of space.
And that, my friends, is heaven in a piece of furniture for someone living in a small space. (And exactly what I needed to finally organize my sewing space.)
(Not sure where to start when it comes to sewing? Building your own sewing kit is an excellent first step! Grab your free, printable worksheet below and start learning how to sew your own clothes today.)
Want to make your own DIY sewing table?

While we don't have a step-by-step plan or tutorial on how to make your own DIY sewing table, you absolutely can. For supplies, all it took was a trip to Home Depot. We didn't buy any kind of fancy wood, just a basic 3/8" birch plywood. We took our measurements with us, and had the team at Home Depot cut the pieces of wood accordingly.
If you DO want to make your own sewing table, these are the measurements we used for the wood:
- Table Wings: 48" x 24" (Per wing, my table has two--One on each side of the center)
- Tabletop Center: 48" x 17" (i.e. The top & bottom of the sewing table)
- Table Sides: 48" x 42" (Per side--You need two sides to close up the table)
- Inner Shelves: 48" x 13" (My table has 2 shelves, but you can do more or less based upon your needs)
- Table Back Side: 14" x 42" (I only needed one, since I closed up the other end of my table with a curtain)
- Table Legs: 44 3/4" Tall (Two per wing--The width is up to you! We chose pretty thin, lightweight ones)
A few additional supplies are also needed to finish up the DIY table:
- Handle: I highly recommend adding a little handle to your table. This simply helps with pulling the table in and out of its storage space--Which is incredibly helpful, because this thing gets HEAVY.
- Caster Wheels: Grab four of these, one for each corner of the table. (Get the ones that move in all directions!)
- Standard Hinges: Two per wing, on either end of the wing. This is part of what attaches the wing to the center of the table.
- Piano Hinges: One per wing, in the center of the wing. This also helps attach the wing securely to the center of the table.
- Small Hinges: Two per wing, one per leg. This is what attaches the table legs to the two outer corners of the table wings.
(Not sure where to start when it comes to sewing? Building your own sewing kit is an excellent first step! Grab your free, printable worksheet below and start learning how to sew your own clothes today.) 
There were only a few final touches that we did to finish up with the sewing table.
Like painting the table white, which goes well with our home decor. And I made a curtain to cover the front, so that you wouldn't just be looking at sewing supplies right when you walked in our front door.
We did debate on making a door for the table's storage area, but decided against it. The table is already big and super heavy, and we just didn't want to add more weight and bulk to it. Also, it's super easy to just flip open the curtain and grab whatever I need.
This sewing table truly is the perfect solution when it came to figuring out how to organize my sewing space. I would, quite literally, be lost without it. With an aching back as well.
AND PLEASE NOTE: The measurements provided for the DIY sewing table are based upon my needs. Meaning how tall I am, how big the space is in which we store the table. You may need a shorter table, or a taller one. Or maybe you need something smaller, or have the space to make something bigger. Please keep this in mind if making your own sewing table!
And if you DO end up making your own DIY sewing table, please don't hesitate to ask any questions. I would love to help out!
(Not sure where to start when it comes to sewing? Building your own sewing kit is an excellent first step! Grab your free, printable worksheet below and start learning how to sew your own clothes today.)


![]()
![]()
![]()